Blanket One: The Last Two Colors
In this update, we're going to cover the last two colors of the Big Granny Square Blanket at one time. It's time to speed this up a lot more... If you're new to the project, click here to start from the beginning.
It is a bit misleading when I say "last two colors". There's more to be worked after this. I just mean the last two colors before we start reusing the colors we've already worked with. And the work I'll be sharing is really going to speed up after this. There's more blankets to get to! What, did you think I was only going to make this one?
If you haven't done so already, click here to download the patterns for these blankets from the Yarnspirations website. Once you have the patterns, check out the options for other blankets that are needed, too. As I say in each of the posts for this project, remember that these patterns are not my design! I only want to get more people involved in crocheting for charity and helping to set this world record. Also, as always, remember that you don't have to make these blankets with Caron United, just make sure your finished size is correct, and try to use bright, happy colors!
Before we begin, let's have a celebratory cheer for the first skein of this yarn I've used that is tangle-free! All others have had some minor knots or tangled loops in the beginning of the skein. Are you using Caron United? Is yours tangled, too?
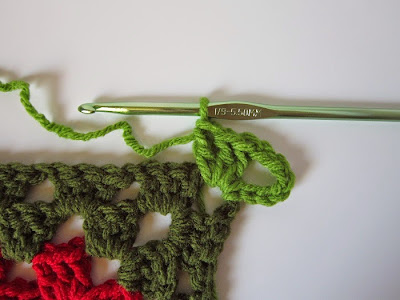 |
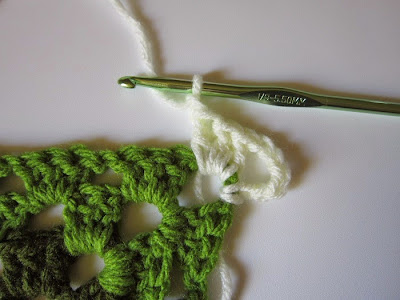
| Being tangle free, I'm "free" to jump right into joining Fresh Green. As with every other round, the new color is joined in the corner space, then begins with chain (ch) 6, which counts as the beginning double crochet (dc) and corner ch-3. Then 3 dc are made in the same space. |
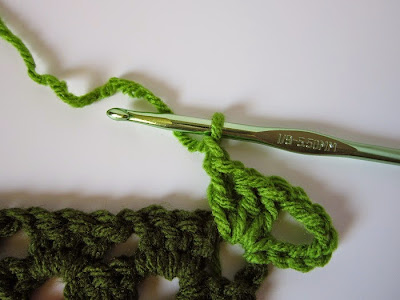 |
| Don't forget to chain one before moving on! |
 |
| In this round, you will (3 dc, ch 1) in each ch-1 space five times before reaching the next corner. Each additional corner is created with (3 dc, ch 3, 3 dc, ch 1) in the corner space. The beginning corner is finished with 2 dc, then joined to the third chain if the beginning ch-6. |
 |
| Here's the second round of this color finished. To begin, slip stitch in the corner space. You will work this round the same as the others, but you will make (3 dc, ch 1) in each ch-1 space six times before the next corner. Bind off and weave in the ends. |
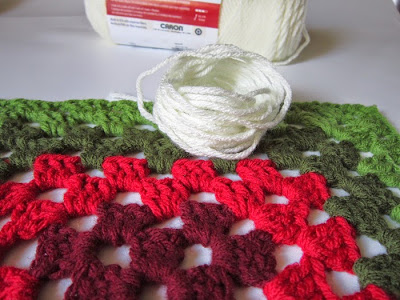 |
| And on to the next color, Aran. No, this skein isn't tangle free, it was untangled previously, when I began using it for a test square. But, like the others, it's "knot" a big deal. A few tangled loops need to be untwisted, then I'm ready to work! |
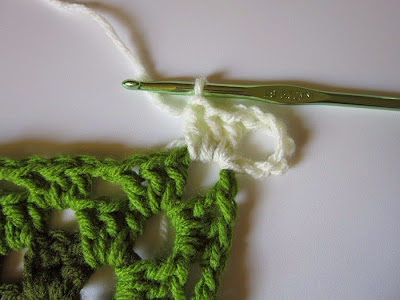 |
| After you join the new color in the corner ch-3 space, this round begins... Exactly the same as the others. You've got the pattern under control now, right? If not, just drop me a comment, and we'll get it figured out together! |
 |
| Don't forget to chain one after the corner! So, why do I always remind you of this? Because it's the step I tend to forget! Do you ever get into what I call "turbo-mode", and you're just working stitches, then realize you're not paying attention? I do. And that's when I always forget to make that chain after the corner! And then I have to listen to that pesky frog: "Rip it, rip it, rip it"! |
 |
| The two rounds worked in the new color are worked exactly the same as the others. Can you do it without any help? In the first round of this color, there will be seven sets of (3 dc, ch 1) between corners. Remember to slip stitch into the corner space to begin the next round. The following round will have eight sets of (3 dc, ch-1) between corners. Each round, as all others, is finished with 2 dc in the beginning corner, and join to the third chain of the beginning chain. |
And that's it for this tutorial... Now is a great time to work on weaving in some of those ends.
And as usual I'm including the second version, worked truly in the round. The working version you see is turned every color change, and this one just goes 'round, and 'round, and 'round... I get bored with it. Why? It's basically the same pattern, either way you work it. Maybe I have turn-itis or something.
Click here if you missed the previous tutorial
Click here for the next tutorial
Happy Crocheting!
.JPG)
.JPG)


Comments
Post a Comment
Spam sucks! Your comment will not be visible until approval. Please do not include links in your comment without permission. Thanks!